Sending Campaigns
Sending Your RCS Campaigns: A Step-by-Step Guide
Ready to send out your awesome RCS messages? Here’s a detailed walkthrough of how to send a campaign using your Esendex Studio Template library:
Finding Your Template
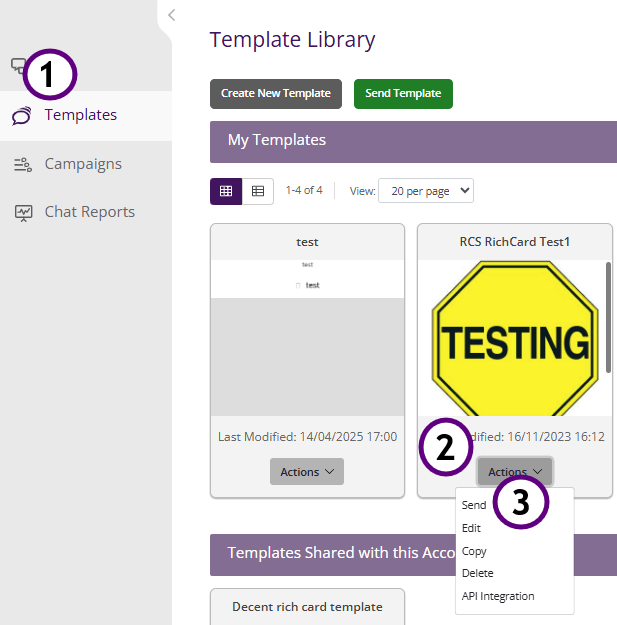
- First, log in to your Esendex Studio account. You’ll want to navigate to your Template library, this is where all your saved message templates are stored
- Browse your templates and find the one you want to send, when you have found the template, select the action button.
- In the action drop down you will have several options, to start your campaign creation, select Send.
Setting up your campaign
Once you have selected send you will start setting up your campaign.

- Template: this is the template you selected in the previous section, you can select a different template here by selecting the dropdown.
- SMS/RCS: You’ll be asked to choose your sending channel. Make sure you select “SMS/RCS” to send your message via RCS (if supported by the recipient’s device) and default to SMS if unsupported.
- Recipients: You have two options to add the people you want to send your message to, lets take a look:
- Uploading Recipients (Bulk Sending):
- This option is perfect for sending messages to a large group of people.
- Using a CSV File: You’ll need to upload a CSV (Comma Separated Values) file. This file should contain your customers’ phone numbers, names, and any other information needed for the variable fields in your template (like dates, locations, etc.).
- Example CSV: We’ve provided an example CSV file you can download to see how to format your data correctly. (add pdf to support section for clients to download)
- Important: Using a CSV file allows you to personalise each message
- Uploading Recipients (Bulk Sending):
-
- Entering Recipients Manually:
-
- This option is for sending messages to a small number of people.
- Text Box: Simply type in your customers’ phone numbers, separated by commas or new lines.
- Please be aware: When sending manually, you cannot use different information for variable fields. The same information will be sent to everyone. Variables are template dependant.
-
- Entering Recipients Manually:
Organising your campaign
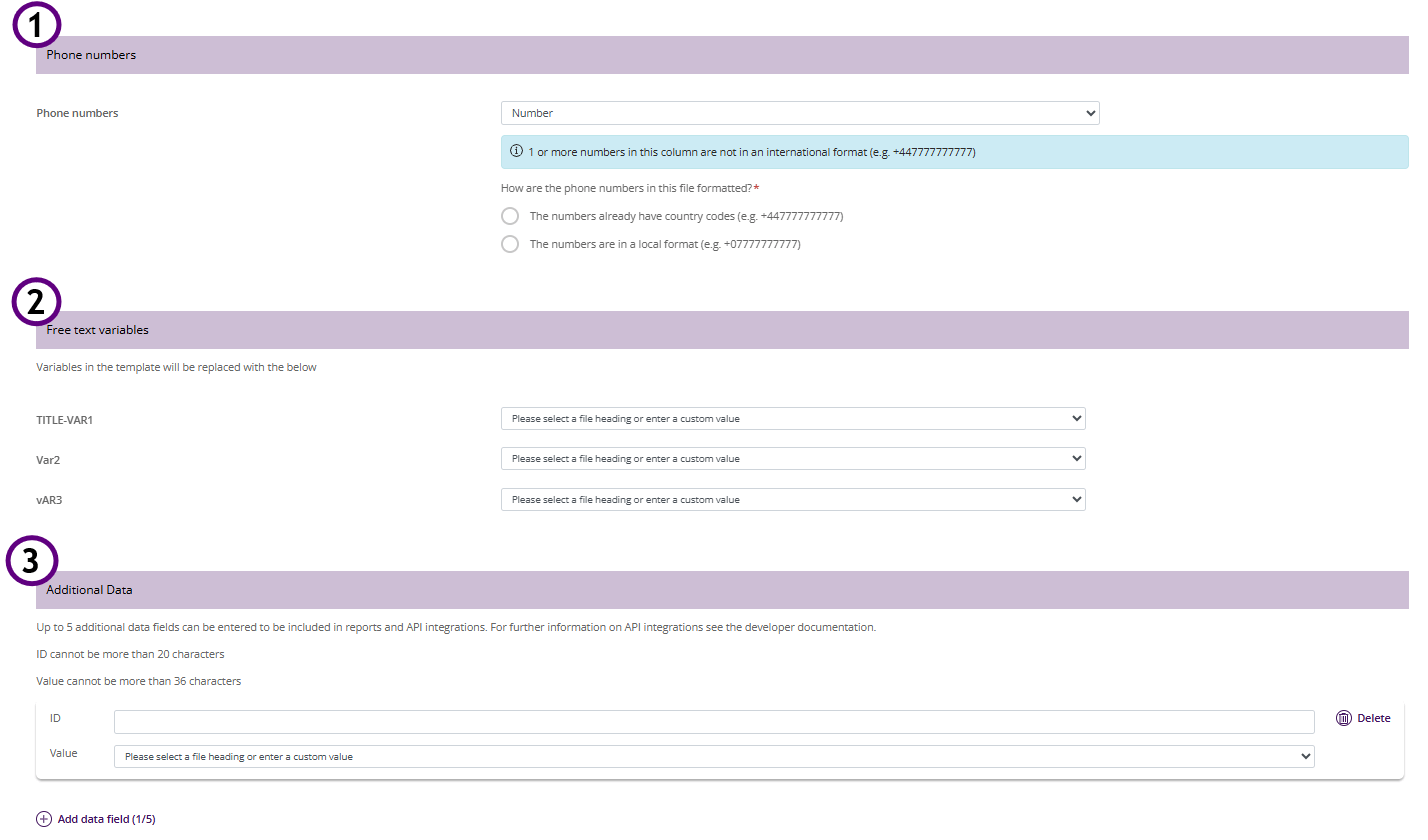
- Phone Numbers: This is Variable field that will take the your contact numbers from your uploaded CSV file, the drop down will have all the fields from your file, select the one that has your contact numbers.
- Free Text Variables: Your variables will be template dependant, The drop-down should supply the titles that align with your column titles in your csv file.
- Please be aware: user are advised to not use the custom option for free text variables.
- Key tip: Match the column titles with variables of the RCS template.
- Additional Data: Data that you can select for tracking to be used in reporting.
Scheduling your Campaign
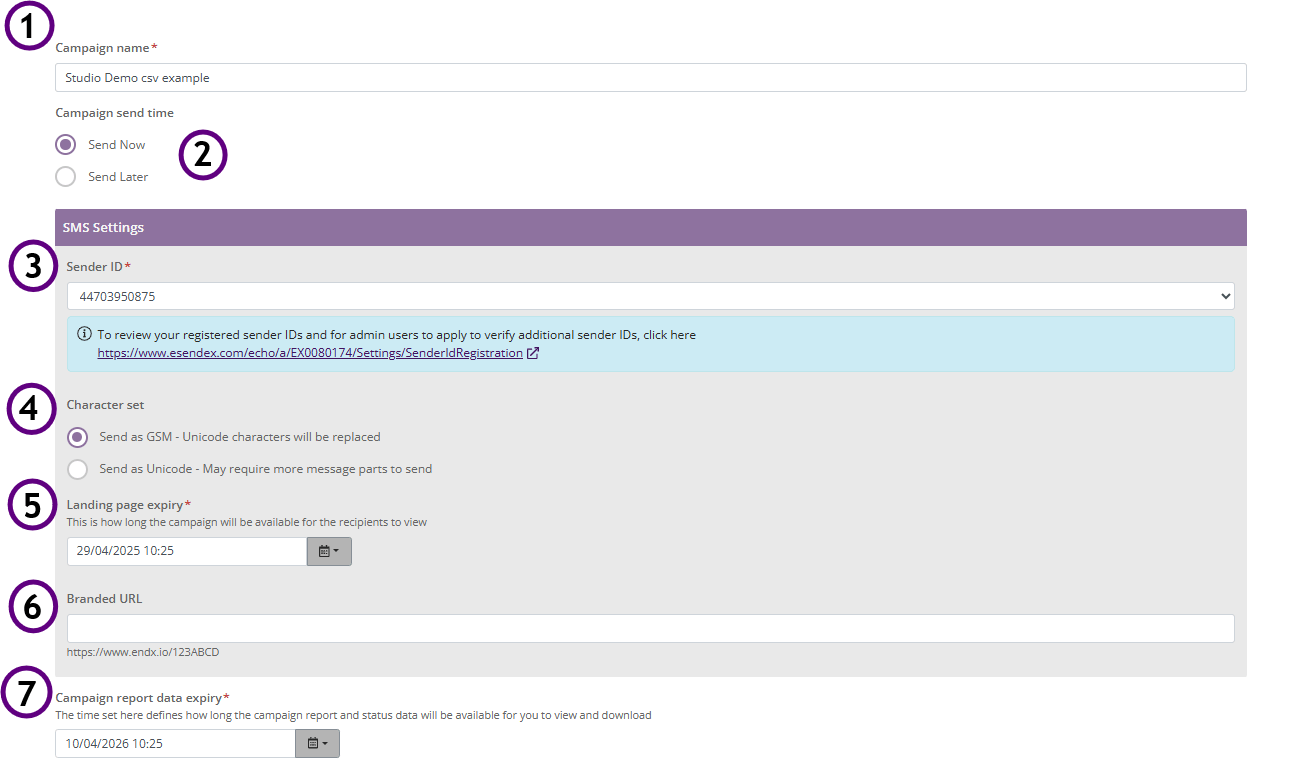
- Campaign Name: This will be the name of your Campaign and what you will see in the campaign section and on your reports
- Campaign send time
- send now: Selecting this will send the campaign once you have completed creating your campaign.
- send later: This will give you a drop down to set the date and time for your campaign to send.
- Sender ID: This will be the Number campaign/message will be sent from.
- Character set
- GSM: Characters that are part of the standard character set for encoding SMS messages, known as the GSM 7-bit alphabet. It includes letters, numbers, and common punctuation, allowing for efficient text message transmission over GSM networks.
- Unicode: A standard that assigns a unique code point to every character, enabling consistent representation of text from different languages and scripts across various platforms.
- Landing page enquiry: This is how long the campaign will be available for the recipients to view
- Branded URL: Allows the customer to change the URLS that are included in their business name.
- Campaign report data expiry: The time set here defines how long the campaign report and status data will be available for you to view and download
Review and send summary
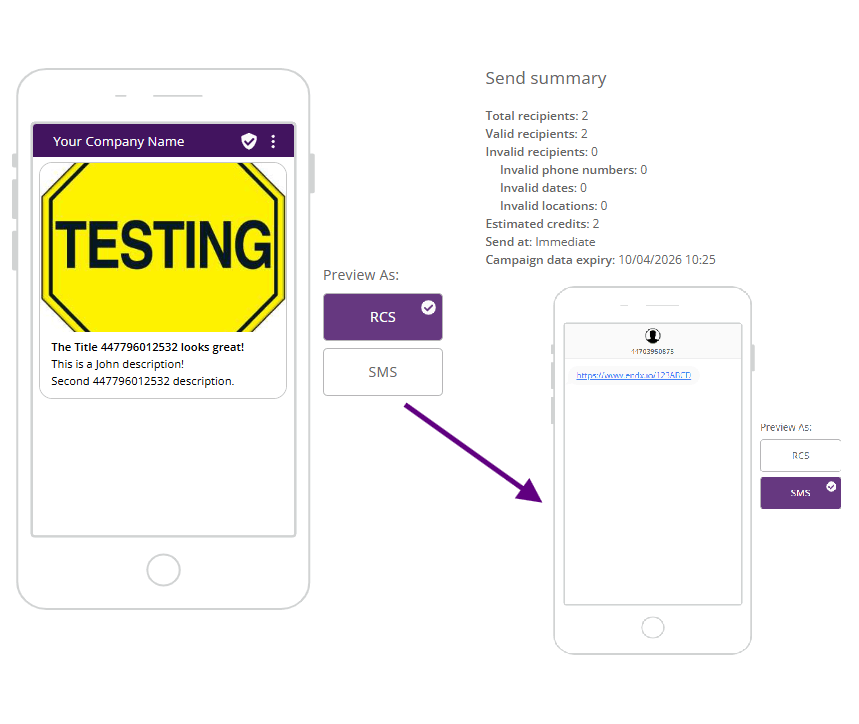
Before sending, you’ll see a “send summary.” This is a crucial step to check all your campaign details.
You will also have the option to view your Campaign as an RCS and SMS.
Send Summary
- Campaign Preview: A preview of your message.
- Total Recipients: The total number of recipients you added.
- Valid Recipients: The number of recipients with valid phone numbers.
- Invalid Recipients: The number of recipients with invalid phone numbers.
- Invalid Phone Numbers: A list of invalid phone numbers.
- Invalid Dates/Locations: A list of any invalid information related to dates or locations.
- Estimated Credits: The estimated number of credits you’ll use.
- Send At: The date and time your campaign will be sent.
- Campaign Data Expiry: The date your campaign data will expire.
Congratulations! you have created your new campaign.