How to get started with Esendex on Zapier
To get started you will first need to connect your existing Esendex account to use with your application.
In order to follow the guidance below you will require the following:
- An Esendex SMS account
- A Zapier account
If you don’t already have an Esendex SMS account, you can register here, while for a Zapier account you can register via their platform.
Making your Esendex Zap – using the Zap editor
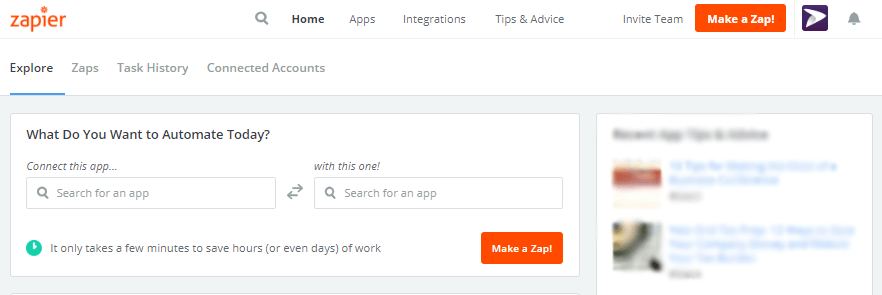
There are two ways you can begin making a Zap once you have created your Zapier account. Both will put you into the Zap editor.Either click the button in the top right corner of the application to “make a Zap”

Or choose which two apps you wish to automate

Choosing your trigger
Next you will be prompted to choose your trigger application which is the software application you wish to trigger the action of sending an SMS via Esendex.
By default you will see any apps you have previously connected with Zapier followed by some of the most popular trigger apps. To find the app that you require use the search function.
In the following example, we have chosen Hubspot.

The following screen will prompt you to choose which specific trigger or event, within your application, you would like to trigger the action of sending a text message. For the purposes of this example we have selected a new contact in a list. Click save and continue to progress to the next screen.
Some apps have numerous triggers available so ensure you pick the correct one that represents the flow you wish your automation to take.

Next you will need to connect the first of your applications to your Zapier account. Click “Connect an Account” and login.
If you have previously connected an account for that app to Zapier then it will show here for you to select.
 Within the set-up options, depending on which application you are using as the trigger, Zapier will ask for further information about that trigger.
In this case, it is asking for further information about the list we want to trigger a text message. Remember in this example the text message will only be triggered when a new contact appears in the specified list.

Zapier will create a test using sample criteria for your trigger. Your zap will try to get up to ten unique samples from the trigger. Choose a sample that you wish to work with.

Choosing your action
The next steps for setting up an action are similar to setting up a trigger. This step is telling Zapier you wish to trigger the action of a text message whenever a new contact is added to that specified list.
Click to add a step. You can add additional actions or filters on the left hand side.

Click action/search – from here, just like with your trigger you will pick the app that will perform the action. Here you will be able to pick Esendex as the action app using the search functionality.
You are then greeted with two different actions:
- Send a scheduled SMS which sends a text message based on the trigger after a specified delay
- Send an SMS which sends a text message based on the trigger

Choose an option and then connect your Esendex account.
To do this click “Connect an account”
Next you will be prompted to enter your username and API password. Click continue and if your login details were correct your Esendex account will now be successfully connected.

Setting up your action template
This step is the most critical to ensure your Zap sends the text message in the way you intend. The template for the Esendex app requires various fields, much like in Echo, to be filled in.

The Esendex configuration requires you to select your account reference from the drop down menu. This is important if your account has multiple users or franchises as it’s the account which your credits will be deducted from.
The recipient phone number can either be one specified phone number or phone numbers separated by commas or you can use the mapped phone number of mobile number field within your trigger application
The message field is the text you wish to send out to your chosen recipient(s). Using the same rules as text messages sent from within the Echo application 1 message credit will be used for every message consisting of 160 characters in length. Any text more than 160 characters will be split and sent as multiple messages.
Each message will be charged as per your account agreement.
Depending on the chosen trigger application you have decided to integrate with, dynamic fields can be used as part of your message.

To use dynamic fields within the text of your message click the plus icon next to the text fields, search for the mapped field and select. You can add dynamic fields at any point within the text message. The content will be included within the 160 character limit.

Testing your Zap
Once configured correctly you can select to test your Zap. If done successfully you will receive an SMS which contains your message text.

Following a successful test you can then name your Zap and turn it on.

Once turned on it will automatically trigger the action of sending of an SMS or scheduled SMS whenever your trigger is met within your first application.
